Sweet to snarky handmade cards using Crackerbox Stamps.

Thursday, January 14, 2010

Be My Valentine

It is only 1 month before Valentine's Day! 
Just another Valentine card. I used Spellbinders for the heart and labels for the image.  In the flower department I found the pearls and just cut them to the size I wanted and then added seperate pearls at the bottom. I colored her with Copic markers.

Share:

Wednesday, January 13, 2010

Bugs & Hugs Valentine

I thought I would make a Valentine's Day card without hearts, my husband said some guys just don't care for hearts.  Usually I don't put rubbon on a guys card but I just had too for this one, but I didn't put a bow on it at least. I colored around the words with Smooch, it was very easy.  The bug was colored with Copic markers. I used Martha Stwart punches for the edges. I thought I cut the card stock the correct size but found that the sides didn't punch out right, so I cut them off between the corners.


Share:

Tuesday, January 12, 2010

Hogs & Kisses Valentine

I can't believe that January is almost half over.  I thought I better get a couple of Valentine Day Cards posted. I will start with our little porker.  I colored him with Copic markers.


I used Martha Stewat's grass punch.  The bottom layer of the grass is the scrap that was left over when I punched out the grass I wanted. Just flipped it around and put it on the bottom. The grass spears aren't as thin but it fills in the bottom real good and it is better than throwing it away!


Share:

Saturday, January 09, 2010

These 2 cards that Betty made can be used for a lot of ocassions, get well, birthday or Valentine's Day.  She embossed the card with a Cuttlebug folder.  She cut both centers out with a square Spellbinder's frames, punched holes in the corners and weaved in and out around the frame and knot it when you reach the beginning. The back is as pretty as the front.

She cut out the center with a rectangle Spellbinder frame and then punched the holes in the corners for the ribbon.  She added a safety pin with beads.


This is the inside of the card, the ribbon is just as pretty.


Share:

Betty's 3 Bugs

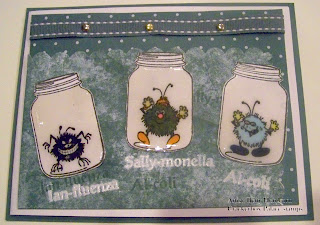
With the weather getting colder here in Wisconsin, Betty made a couple of get well cards.  She made a couple of different ideas with the same stamps. The jars on both cards are covered in lacquer.  The background paper on both cards were inked with a small brayer.
 On the first card Ian-fluenza was colored red but when Betty put on the lacquer, it turned it orange.  She embossed their names on the background with white embossing powder.

The names were stamped with VersaMark on the background and embossed with white embossing powder under the jars.

This is the inside of the card, and it flips up for your personal note and signature.

Share:

Thursday, January 07, 2010

4 Season Box

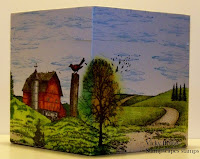
I thought I would share one of the gifts I made for a couple of my friends for their craft tables. I found the wooden boxes at Michaels.  I did 2 sides on one sheet of paper ( I used Crygon paper ). I stamped and colored with Copic markers before I glued them on the box.  I added clouds to the box and the lid so the lid would blend to the box better. I know I didn't use any of our stamps, I used mostly Stampscapes stamps, but I just love them too.


Spring


Summer


Fall


Winter


Spring / Summer side

Summer / Fall side

Top of box
Share:

Monday, January 04, 2010

Barbara Housner's Pink Cow


Barbara Housner made this card with our Bridgette cute cow. She made this card for a magazine Simply Sentiments and had it published.  I thought it was a very different on the way she stamped the cow on pink card stock instead of making it black and white.  Thanks Barbara, I have always thought this card was very unique. Her blog site is: papertherapyponderings.blogspot.com

F00504
Share:

Friday, December 25, 2009

Merry Christmas Ornament

Merry Christmas to everyone and hope your holidays have been happy and healthy.
I made this ornament out of the Cuttlebug die cut. I used our stamp for the Merry Christmas. The oval for the saying was cut from Spellbinder oval.  The border on top of the ornament is a Cuttlebug border and below is the Swiss dots from Cuttlebug. The top and bottom were made from Martha Stewart punches.


This is the Cuttlebug die I used for the ornament.
Share:

Shop Crackerbox Stamps

Search This Blog

Translate

Blog Archive

 
09 10